

jaguar
Cockpit Part 1
A place to put your chair…
In order to continue the construction of the Jaguar, I needed to get the basic structure of the cockpit completed. The area that constitutes the cockpit enclosure, sans any component that projected above the cockpit sills, needed to be completed before I continued the model construction. So everything but the seat, instrument panels, multi purpose color display / projected map display and canopy closure and air conditioning details was built now.
The usual fabrication methods of CNC milled and 3D printed parts were used to make the various structural parts and details. The aft bulkhead and side walls were milled from acrylic sheet. The side and center consoles were printed along with a bunch of detail parts. In the past I have made photo etched parts for the individual panels, in fact I had a sheet of photo etched parts made when the model was originally in 1/16th scale. On this model I opted to machine the panels from 0.060” styrene sheet. The advantage over photo etched parts I was able to incorporate more details into the panels.

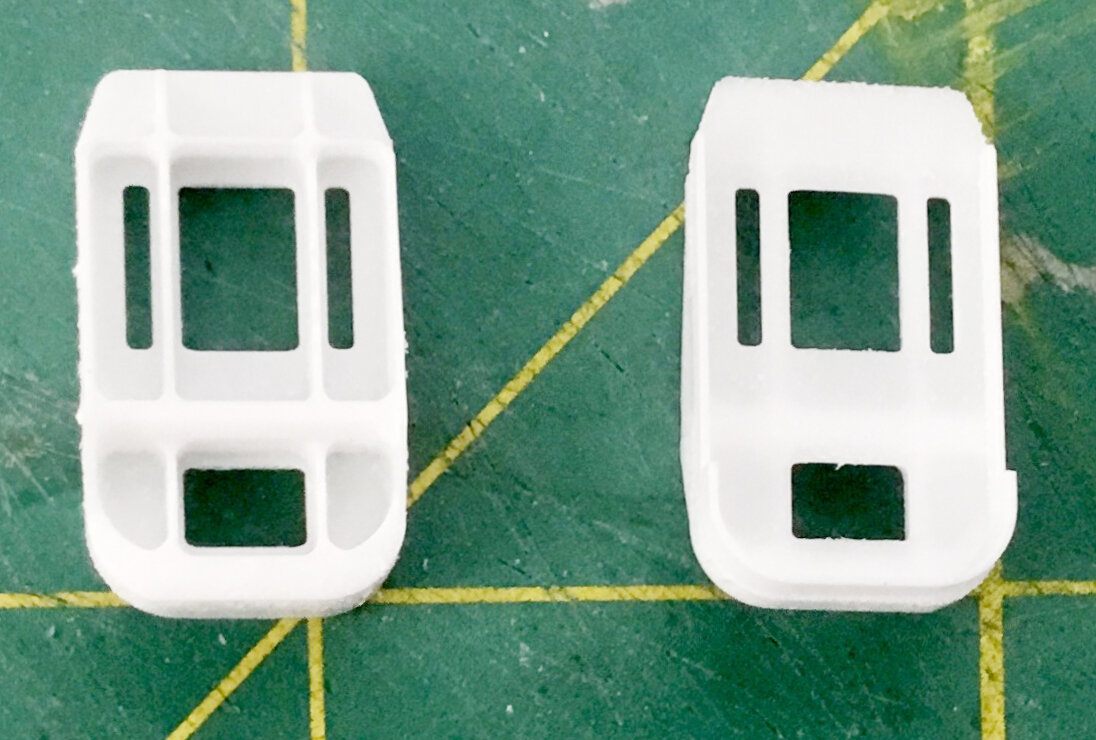
Printed parts. Unidentified parts were used in the nose gear well.

Milled panels.
Milled rudder pedals.
Nearly every part was given a coat of “black” paint, mixed from black and white Mr. Hobby, Mr. Color paints. I varied the mix from 10% to 30% white added to the black and since I used my small airbrush cup and I wasn’t fussy about the mixing up a fresh cup, I ended up with a subtle variations of black.

Primed and base colors applied.
At this point I took a break from the Jaguar and decided to do a little side project. I was captivated by YouTube channel Night Shift, the protagonist Uncle Night Shift demonstrated some awesome finish and weathering techniques. I just had to try them out. Since I have a soft spot for Israeli armor I picked up a kit and put his techniques to the test. A side benefit was I grew paint collection exponentially. The reason I mention it here is because the tank was an excellent practice and some of the techniques were applied to the Jaguar cockpit finish.

Painting practice side project.
Assembly of the panels proceeded as follows. Custom decals were printed, white ink on clear and black decal sheets. Decals were applied to the panels, semi gloss clear coat on top. Details were then picked out with paint in appropriate colors. Knobs and switches were added. Some of the larger knobs were printed parts as well as a few stand alone switches (similar to those applied to the Weapon Main Unit in the nose gear well). The rest of the smaller knobs and switches were made from styrene rod stock. Switches with rounded or larger diameter ends were adjusted with a bit of Mr. Surfacer 500.

Side panels and wire cover.

Left and center consoles.

Right console.

Decal production.
Once all the parts were assembled and painted it was time to add some wear and weathering. The canopy sils and console edges generally showed a good bit of wear with a good bit of bluish gray, chromate and silver colors showing. Using a combination of chipping methods either using chipping fluid or brush painted chips I replicated the effect I observed in the real cockpits. Most edges of the panels were carefully outlined with a metallic silver color pencil that help made them stand out a bit.
A first for me was to add dust and dirt to the cockpit. I simulated accumulated dust in the recess and corners with Wilder Aqua Line Common Dust. The Wilder paint could be reactivated with a damp paint brush that allowed me to blend and remove the excess, much like an enamel or oil paint wash. A little Mr. Hobby weathering pigment was added to tone down the yellowish hue of the Wilder paint. Even after adding the pigment, he result was still a bit stark so I darkened the effect with Ammo Africa Korps brown wash.

Left view.

Right view.

Front view.
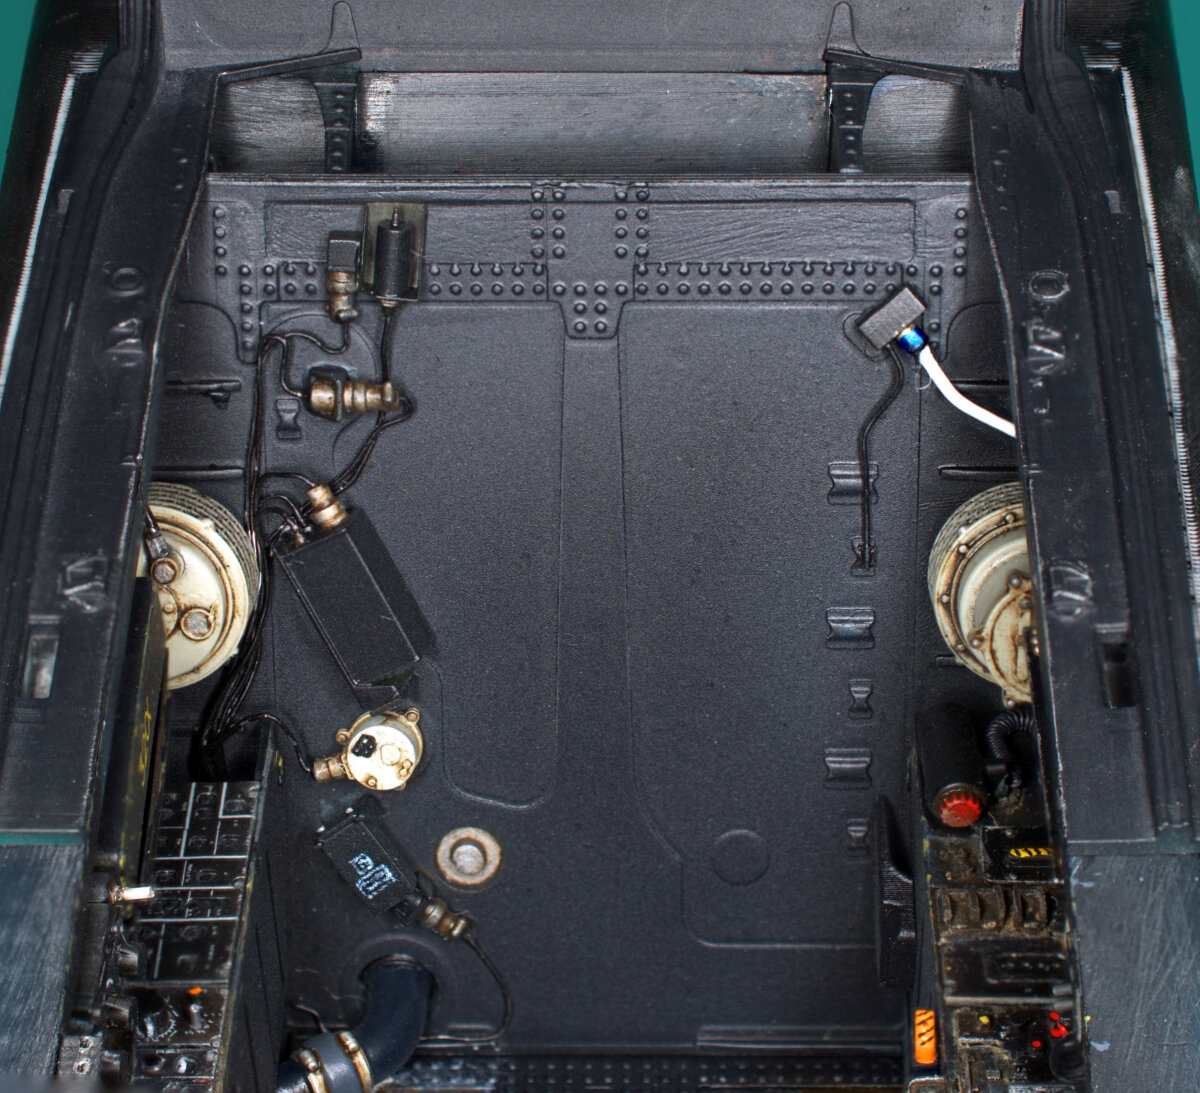
Aft view.
More construction large part construction is next. I have most of the fuselage parts up to the engine faces ready to assemble. Lots of surface finish and exterior panels to be tackled. I'll have a new process for applying aluminum panels to the fuselage surface to show off. Thanks for checking in!
Written and performed by,
Timmy!
March 29, 2020